Inventory keeps a list of the property your organization owns: what each item is, its barcode, and how many there are. People sign in with a name and PIN; an admin decides who has access and at what level.
What you can do
Volunteer
Editor
Admin
Sign in, search, scan a barcode to look an item up
Yes
Yes
Yes
Mark an item as viewed; read Activity
Yes
Yes
Yes
Add, edit and delete items; change quantities; print labels
–
Yes
Yes
Add people and set their Inventory access
–
–
Yes
Every entry in the contents, and every link in the text, jumps to that topic. The pictures show a sample organization with made-up items and people.
Everyone
Signing in, finding items, scanning and your account. This part is for everyone who uses Inventory.
Opening Inventory and signing in
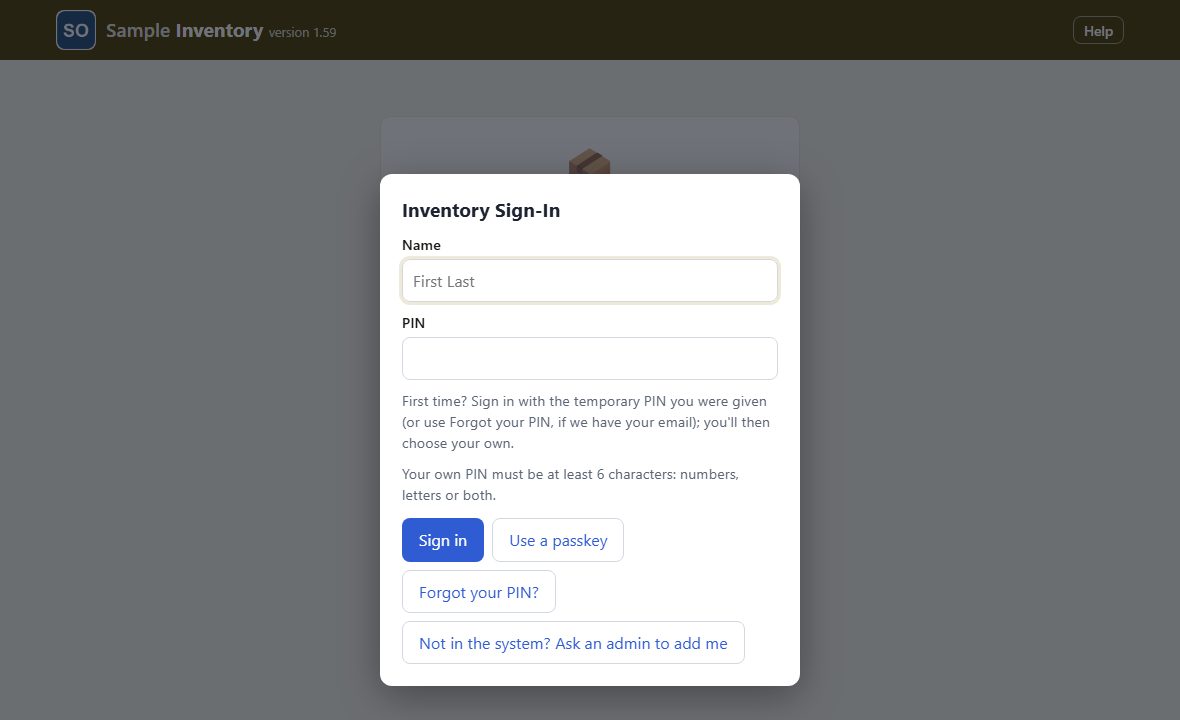
Open Inventory in your browser or from your home screen. The sign-in box opens by itself. Inventory holds private property records, so it asks for a name and PIN every time you open it, and nothing is shown until you sign in. If you close the box, tap Sign In on the page behind it.
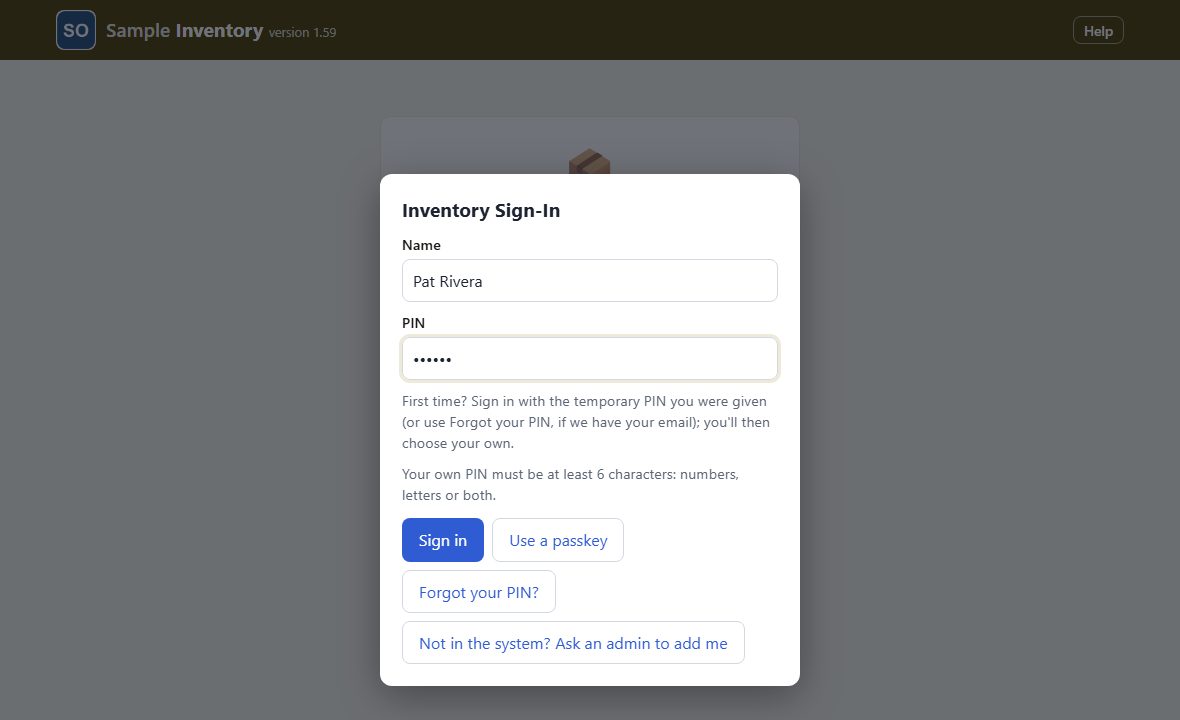
Type your full name and your PIN, then tap Sign in. A PIN is at least 6 characters: numbers, letters or both. First time here? Sign in with the temporary PIN an admin gave you; the box then asks you to choose your own. A temporary PIN works once and expires after 14 days.
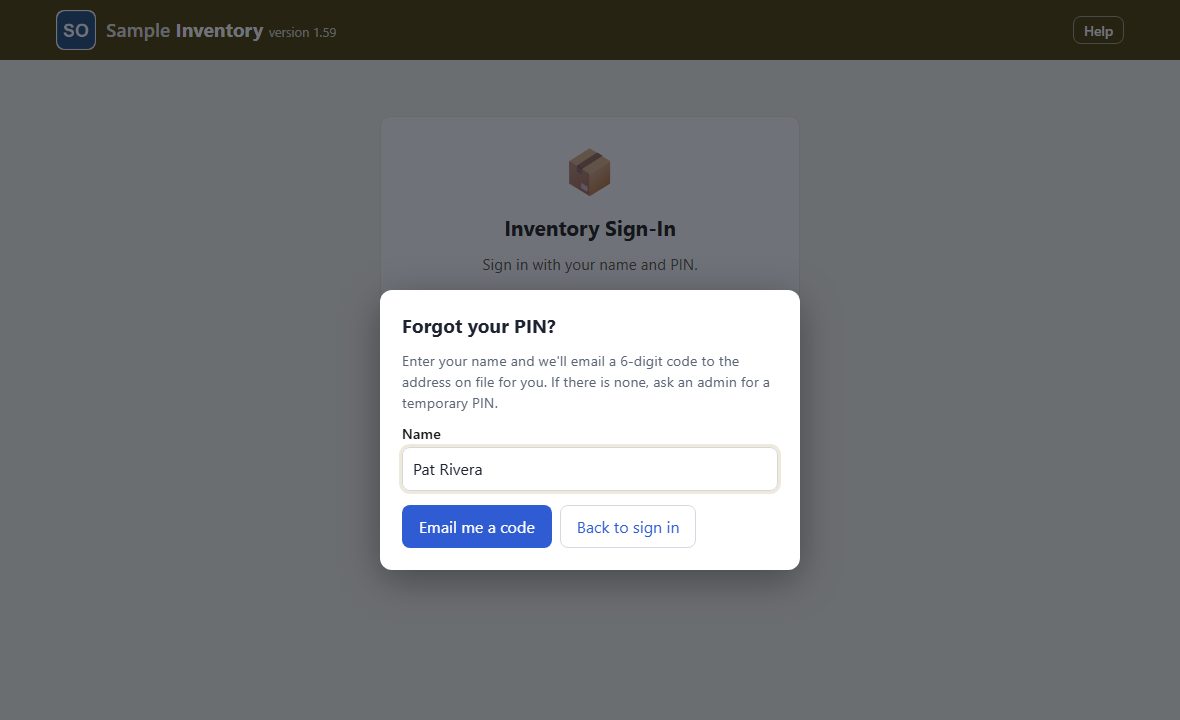
Tap Forgot your PIN?, type your name and tap Email me a code. A 6-digit code is emailed to the address an admin has on file for you. Type the code and choose a new PIN. If no email address is on file for you, ask an admin for a temporary PIN instead (see Changing access, temporary PINs and removing people).
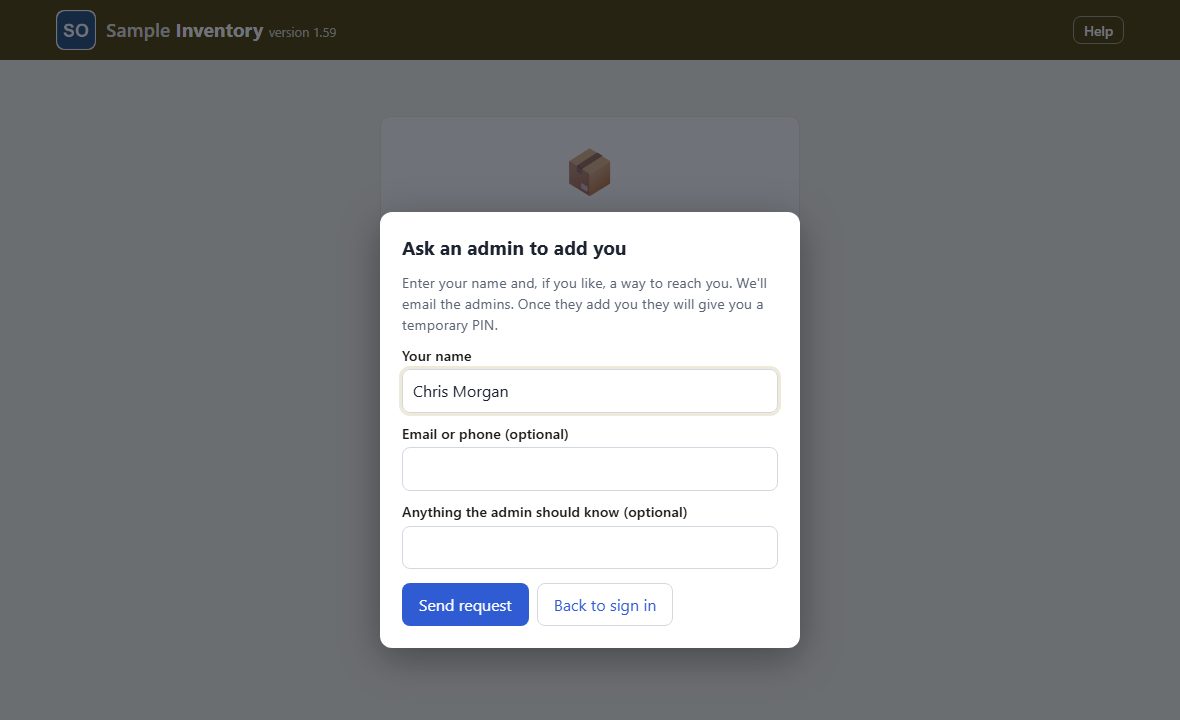
Only people an admin has added can sign in. Tap Not in the system? Ask an admin to add me, type your name (and, if you like, an email or phone number and a note), and tap Send request. The admins are told; once they add you, they give you a temporary PIN.
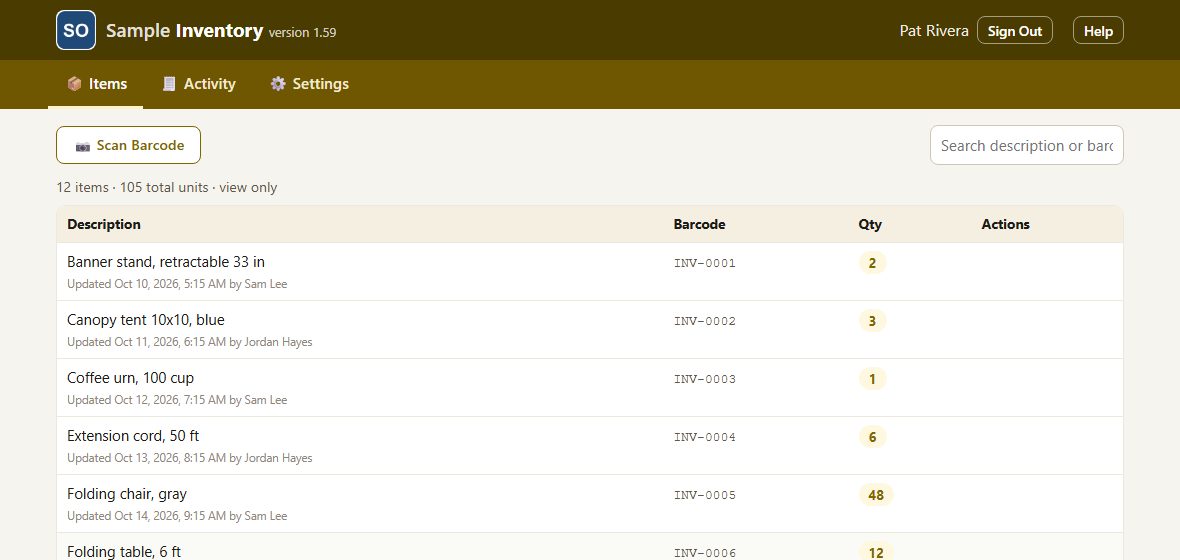
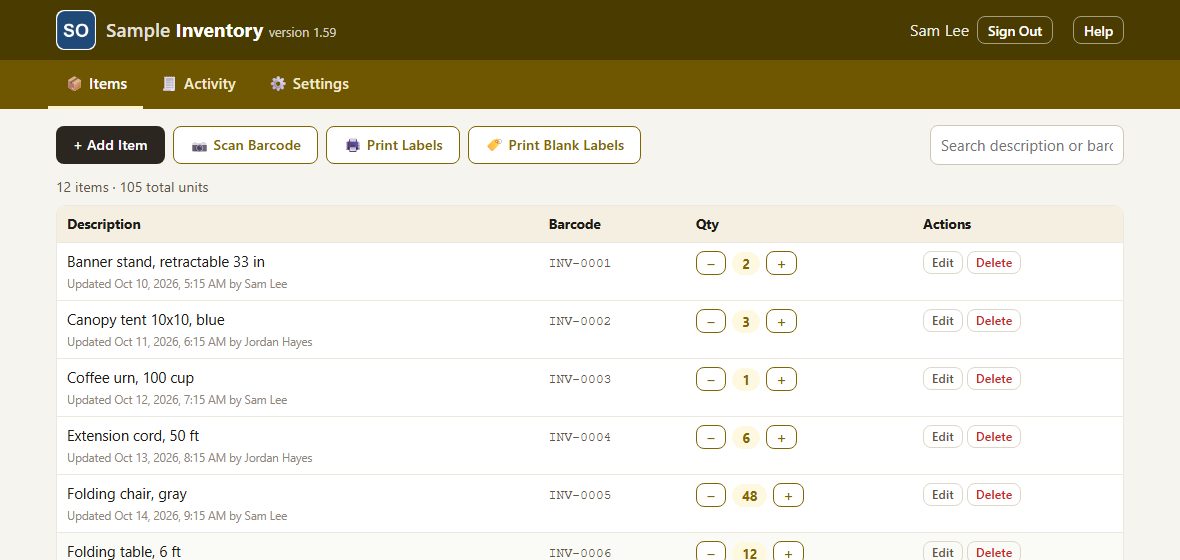
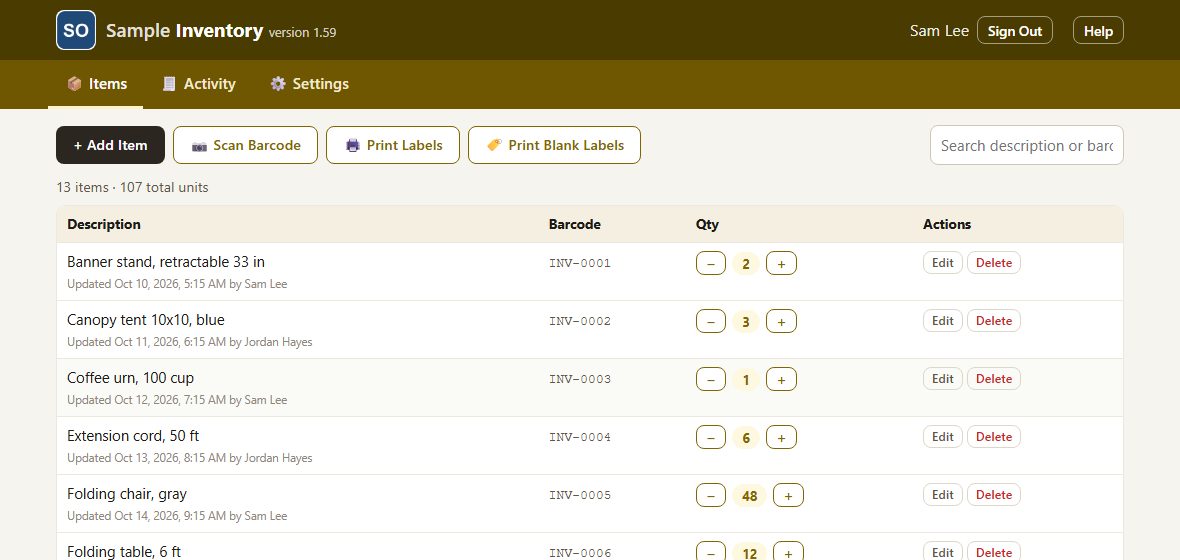
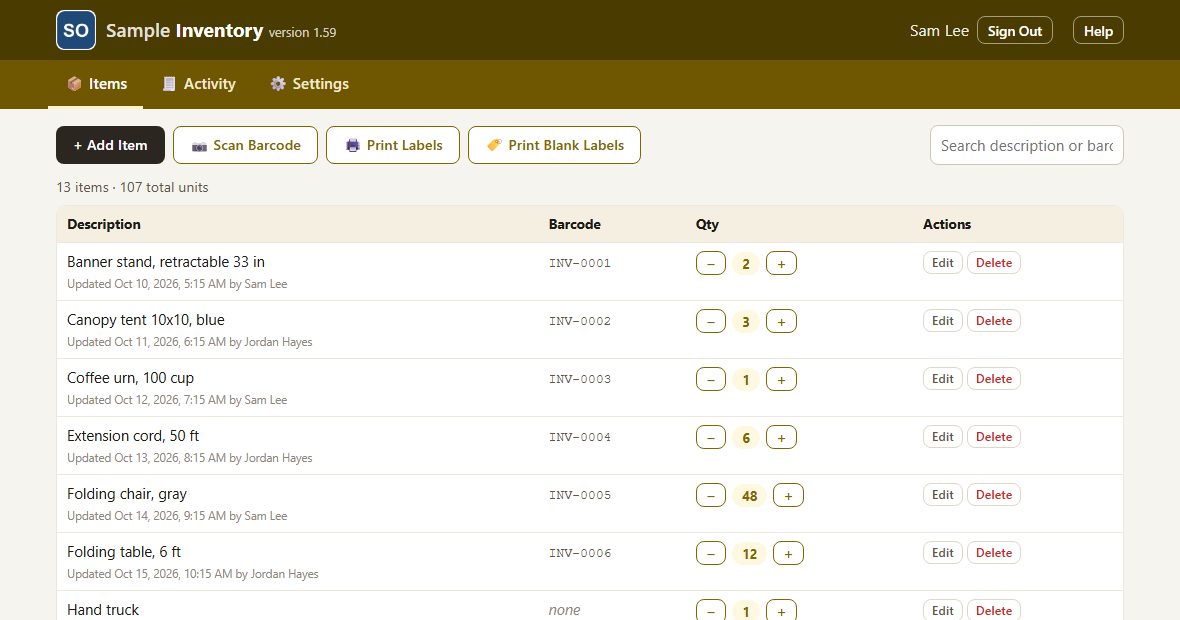
After you sign in you land on Items, the list of everything your organization keeps track of. Each row shows the description, its barcode (or none), the quantity on hand, and who last changed it and when. The line above the list counts the items and units; for a volunteer it ends with view only: you can look things up but not change them. The tabs under the header are Items, Activity (The Activity tab) and Settings (Settings: your account).
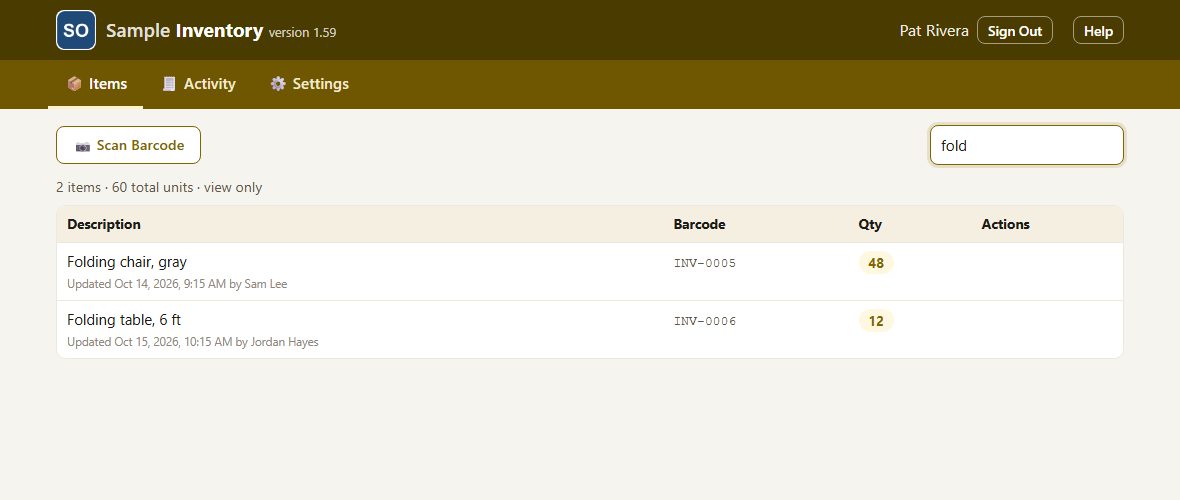
Type in the search box at the top right. The list narrows as you type, matching part of the description or the barcode. Clear the box to see everything again. Searching never changes anything.
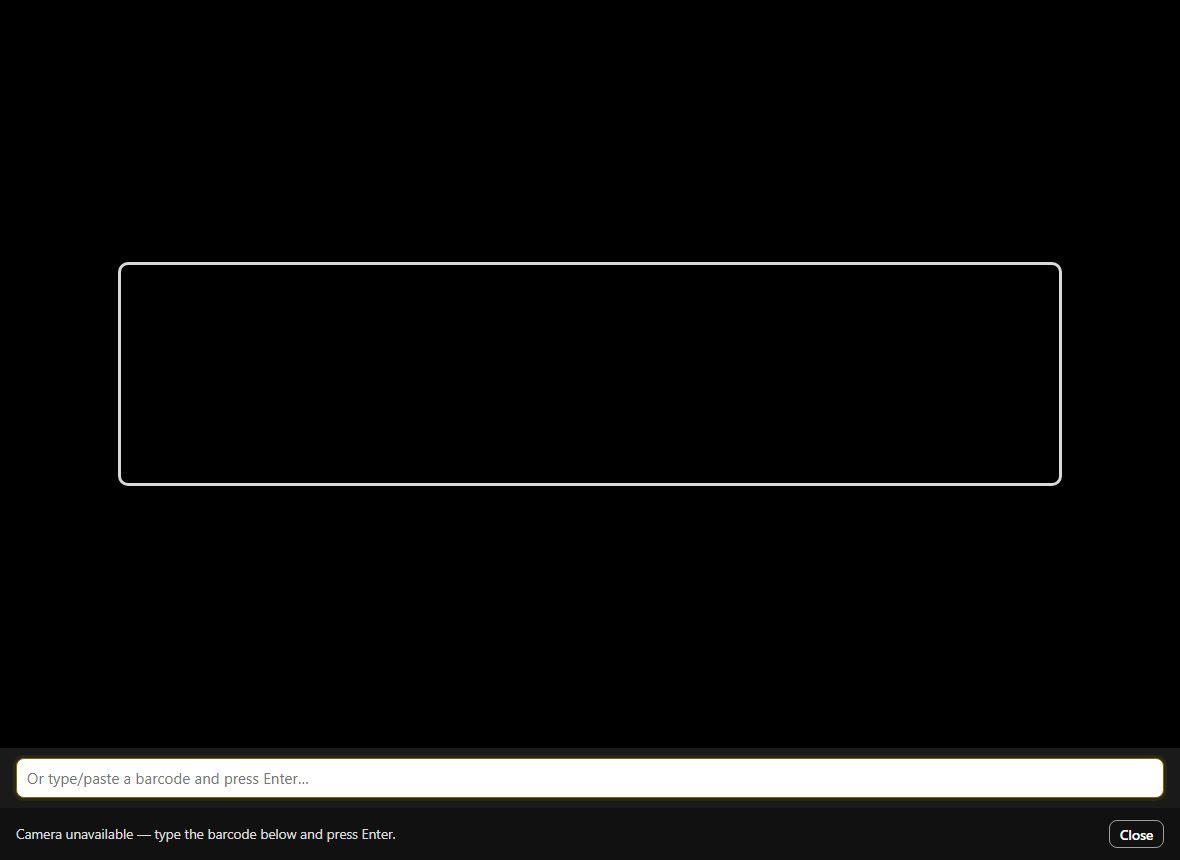
Tap Scan Barcode to look an item up by its label. On a phone or tablet the camera opens; point it at the barcode. Many handheld and USB scanners simply type the code, so the box at the bottom, Or type/paste a barcode and press Enter, always works too. If the camera can't start, a message says so and you can still type the code. Tap Close to leave without scanning.
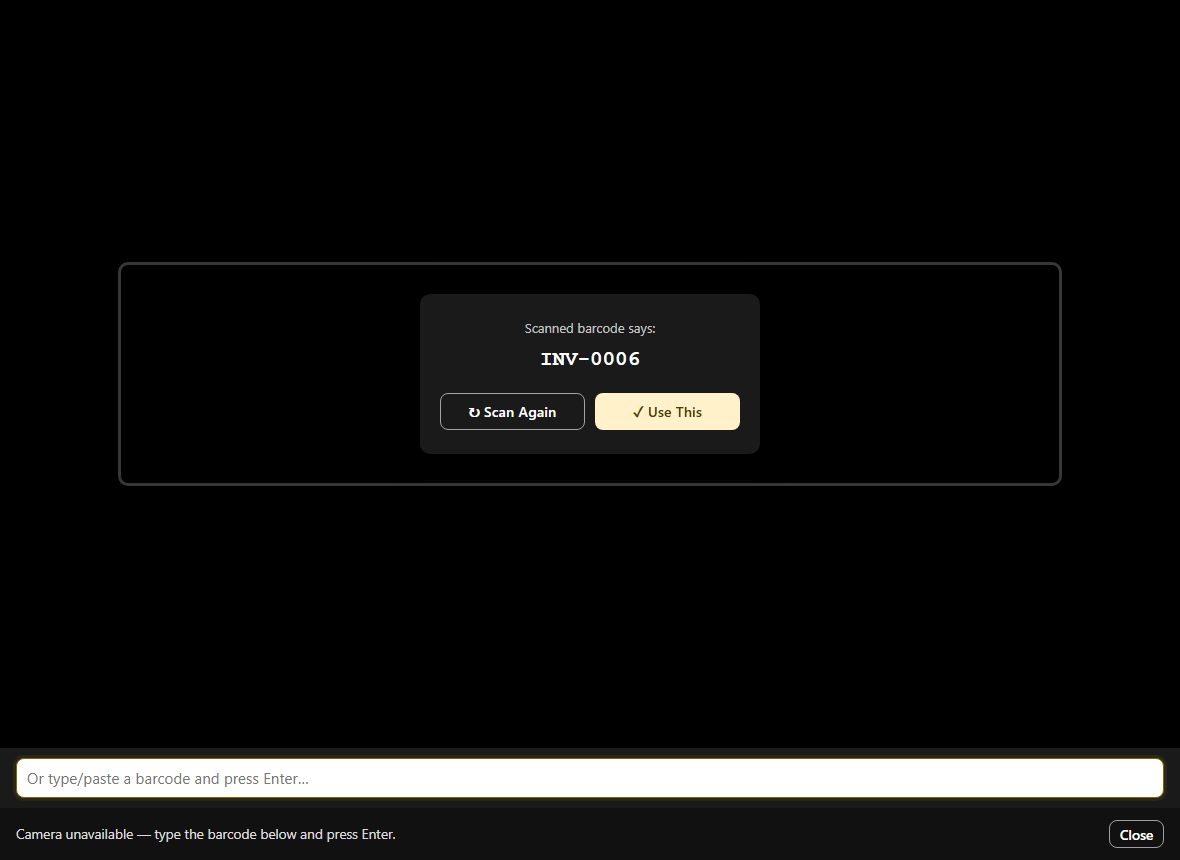
A scanned code is never used straight away. The screen shows Scanned barcode says with the code in plain letters so you can check it. Tap Use This to go on, or Scan Again to try another.
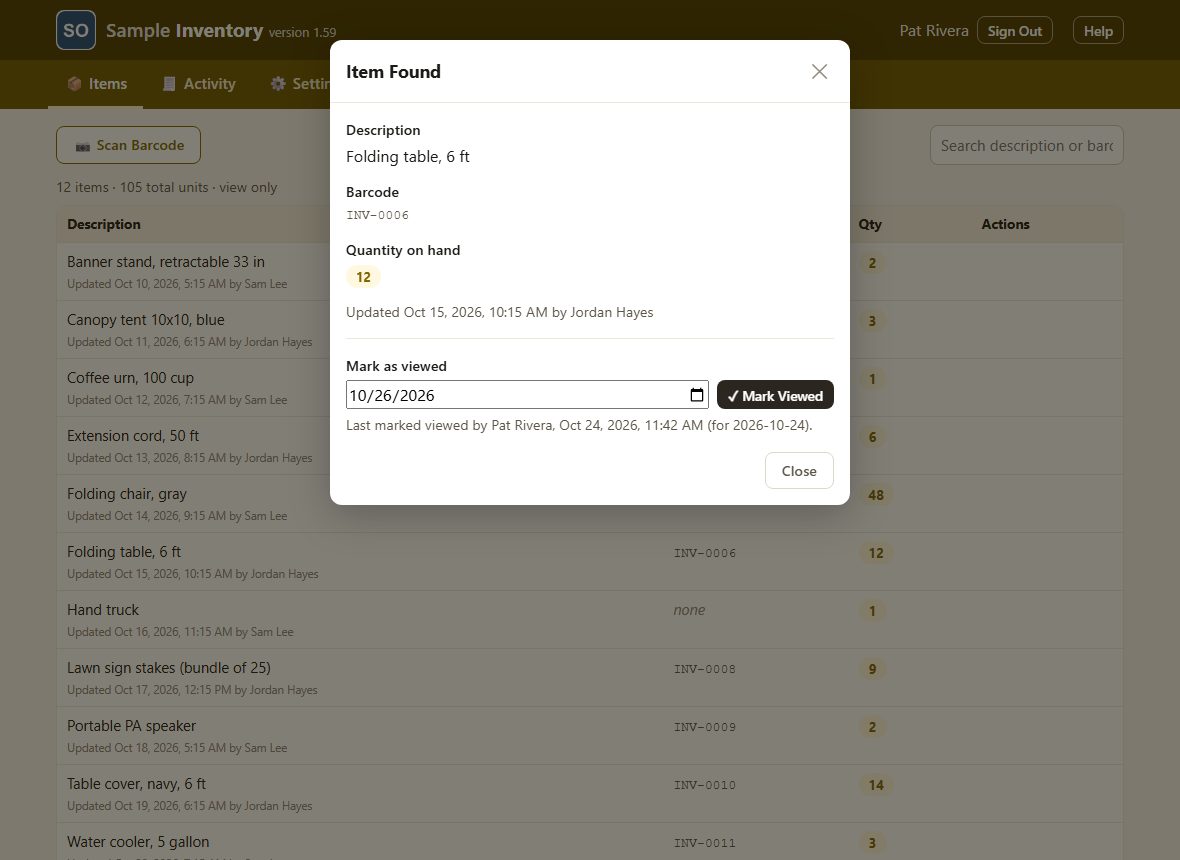
If the barcode belongs to an item, Item Found shows its description, barcode and quantity on hand, who last updated it and when, and when someone last marked it as viewed. If no item has that barcode, a short message says so. (Editors get different choices here; see Scanning as an editor.)
When you have seen the item with your own eyes, for example during a yearly count, choose the date in the Item Found box (it starts as today and can't be in the future) and tap Mark Viewed. This records who saw it and when, with the quantity on hand at the time. It doesn't change the item, so you don't need editor access. The entry appears in The Activity tab.
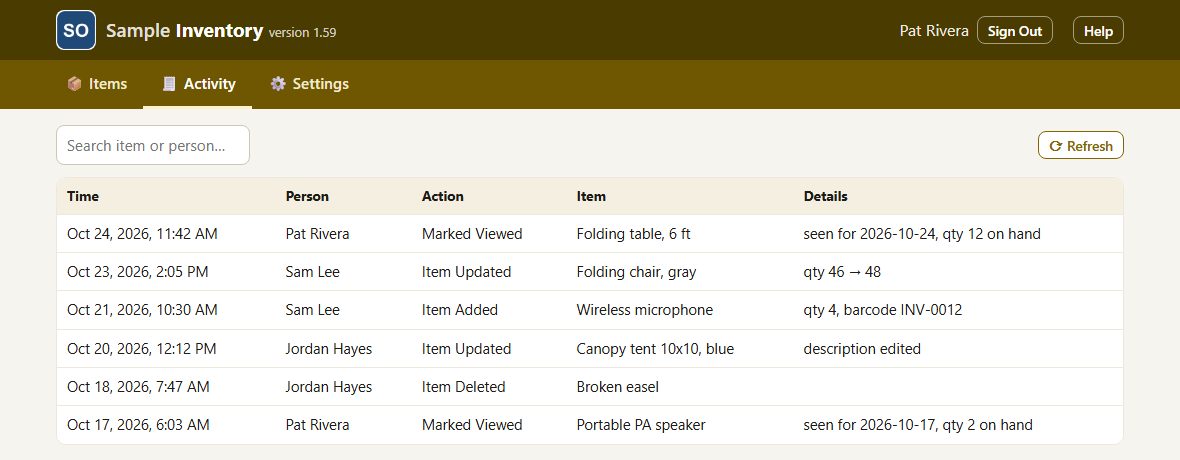
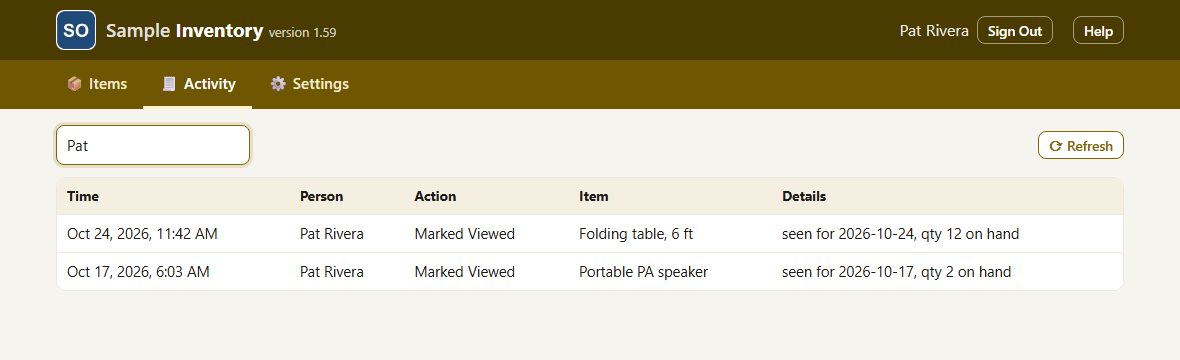
Activity is the running history, newest first: the time, the person, what happened (Item Added, Item Updated, Item Deleted or Marked Viewed), the item, and the details such as qty 46 → 48. Everyone signed in can read it. It shows the latest 300 entries; tap Refresh to load new ones.
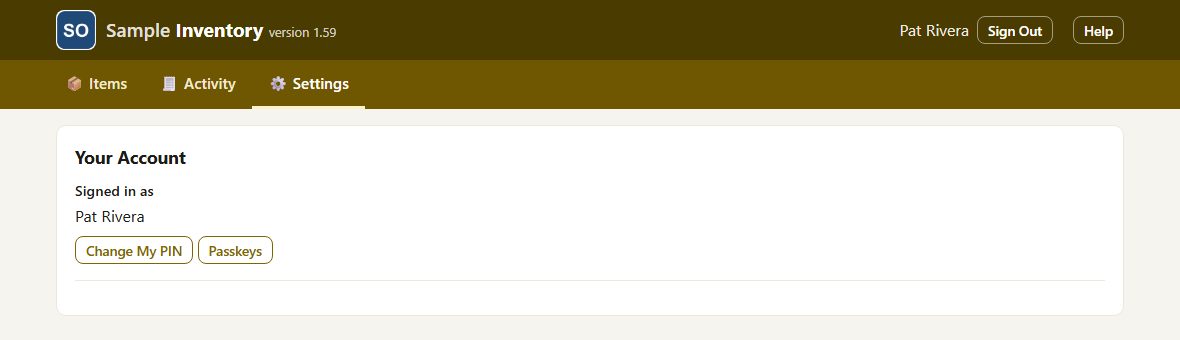
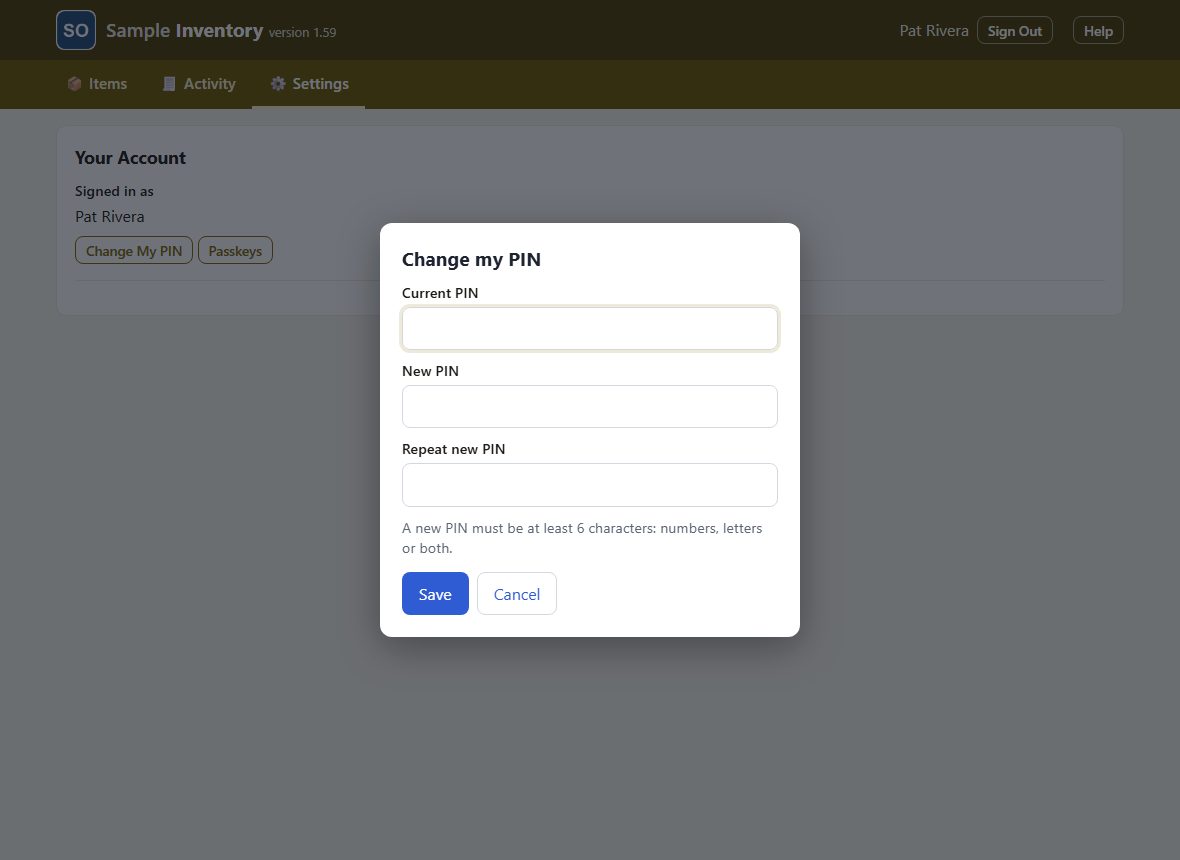
Tap Change My PIN, type your current PIN, then the new PIN twice, and tap Save. A new PIN is at least 6 characters (numbers, letters or both). Choose something others can't guess, and don't share it.
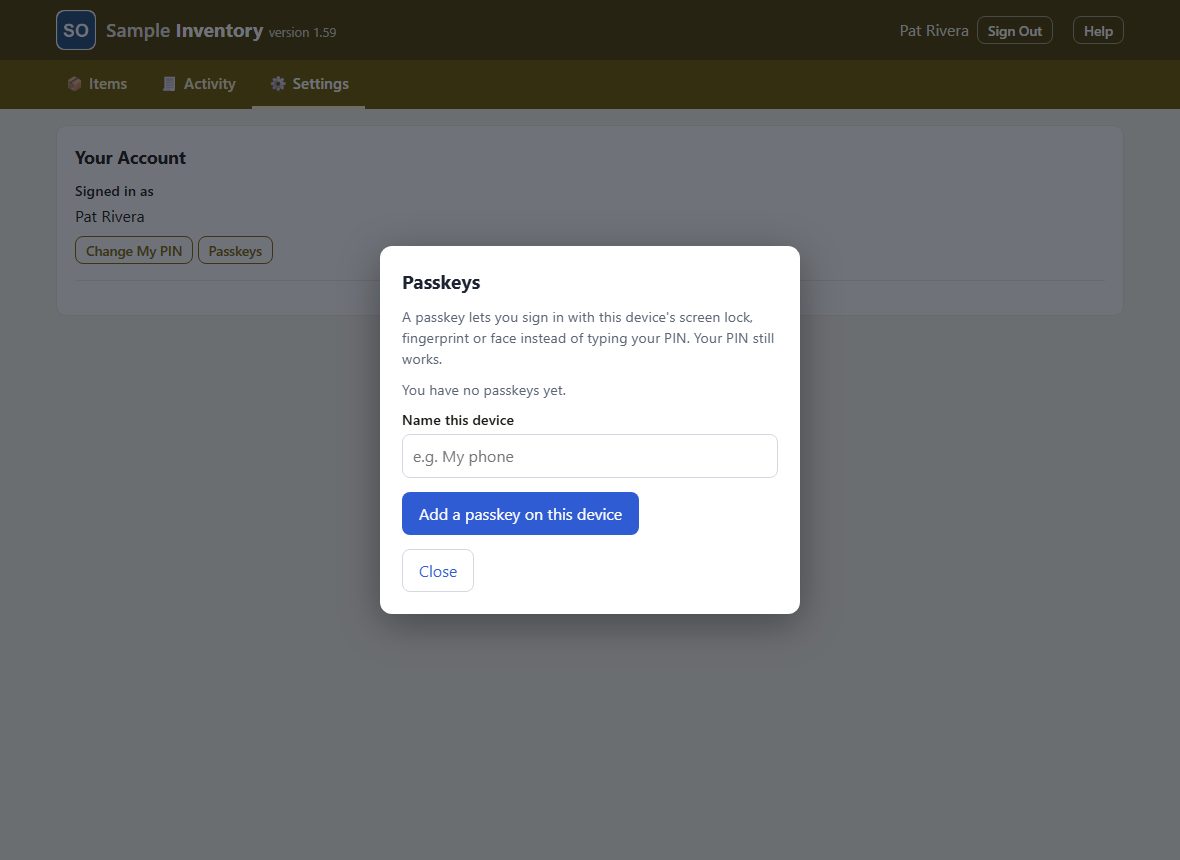
Tap Passkeys to let your phone or computer sign you in with your fingerprint, face or screen lock instead of typing your PIN. Name the device, tap Add a passkey on this device and follow your device's prompt. Afterwards the sign-in box offers Use a passkey; your PIN still works. A passkey belongs to the device and web address where you set it up.
The Help button at the top right opens this manual in a new tab, signed in or not. Tap Sign Out at the top right when you are done, especially on a shared computer; the sign-in box comes back for the next person.
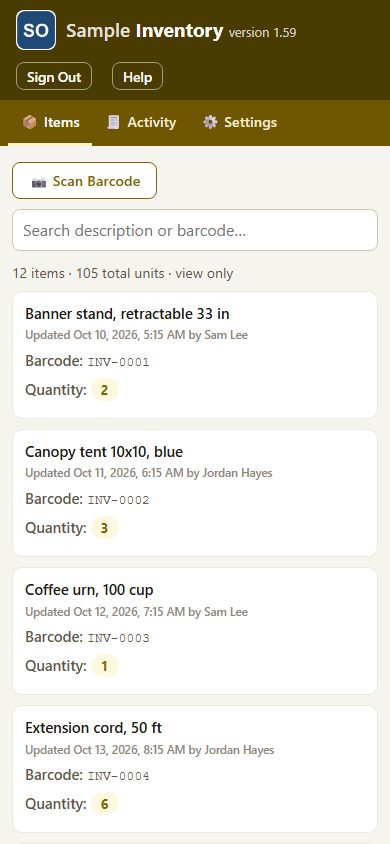
Inventory works the same on a phone: the list turns into cards, one per item, and the buttons are the same. A phone or tablet may show an Install App bar that adds Inventory to your home screen; tap How for the steps or Not now to hide it for two weeks. Scanning with the camera is easiest on a phone.
When a new version has been downloaded in the background, a bar says A new version is available. Tap Update now to switch to it. Nothing changes until you tap.
If your organization's license isn't active, a notice says Inventory is paused and items can't be changed (looking things up still works). Tell a site admin; once the license is renewed the notice clears on the next check, or tap Check again.
Adding, changing and labeling items. Editors and admins do everything in the first part, plus this.
What an editor sees
The toolbar has four buttons: + Add Item, Scan Barcode, Print Labels and Print Blank Labels. Each row has a quantity stepper with − and +, and Edit and Delete buttons. The line above the list no longer says view only. If you don't see these, your access is Volunteer; an admin can raise it (Changing access, temporary PINs and removing people).
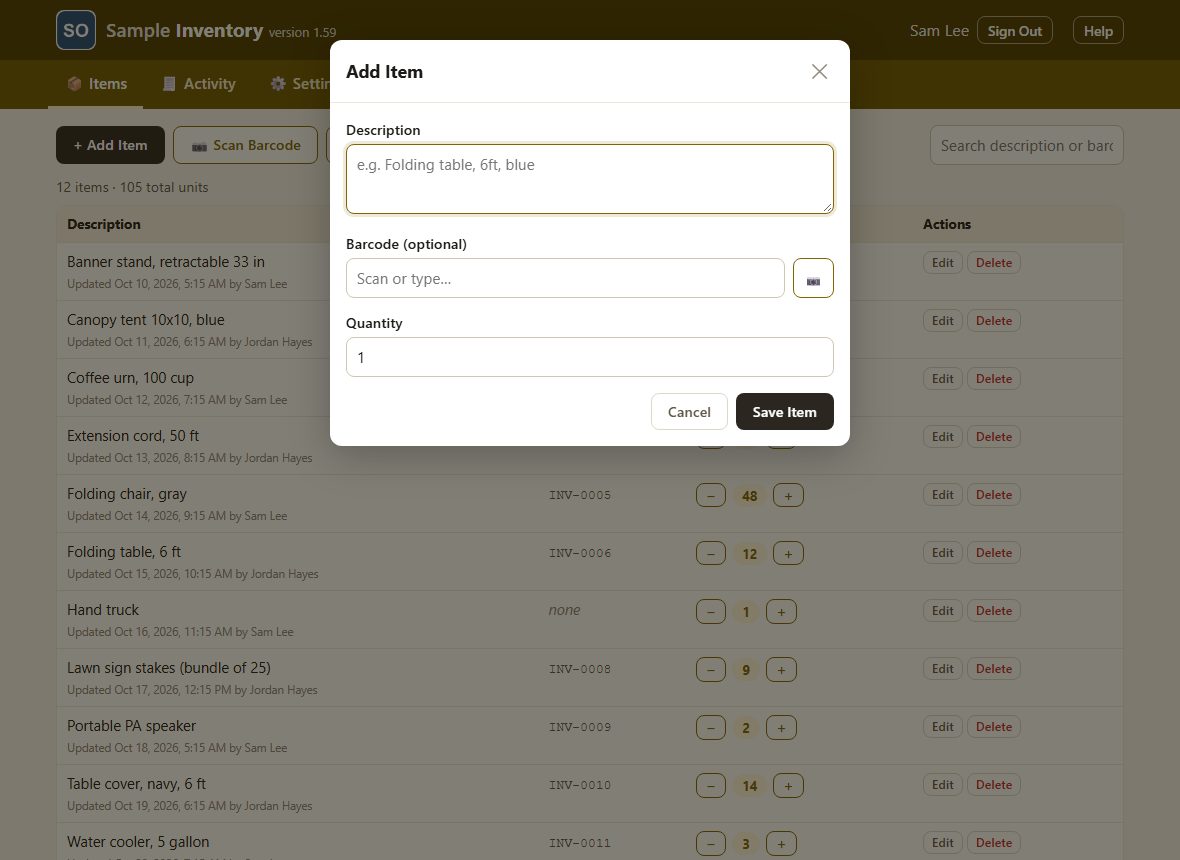
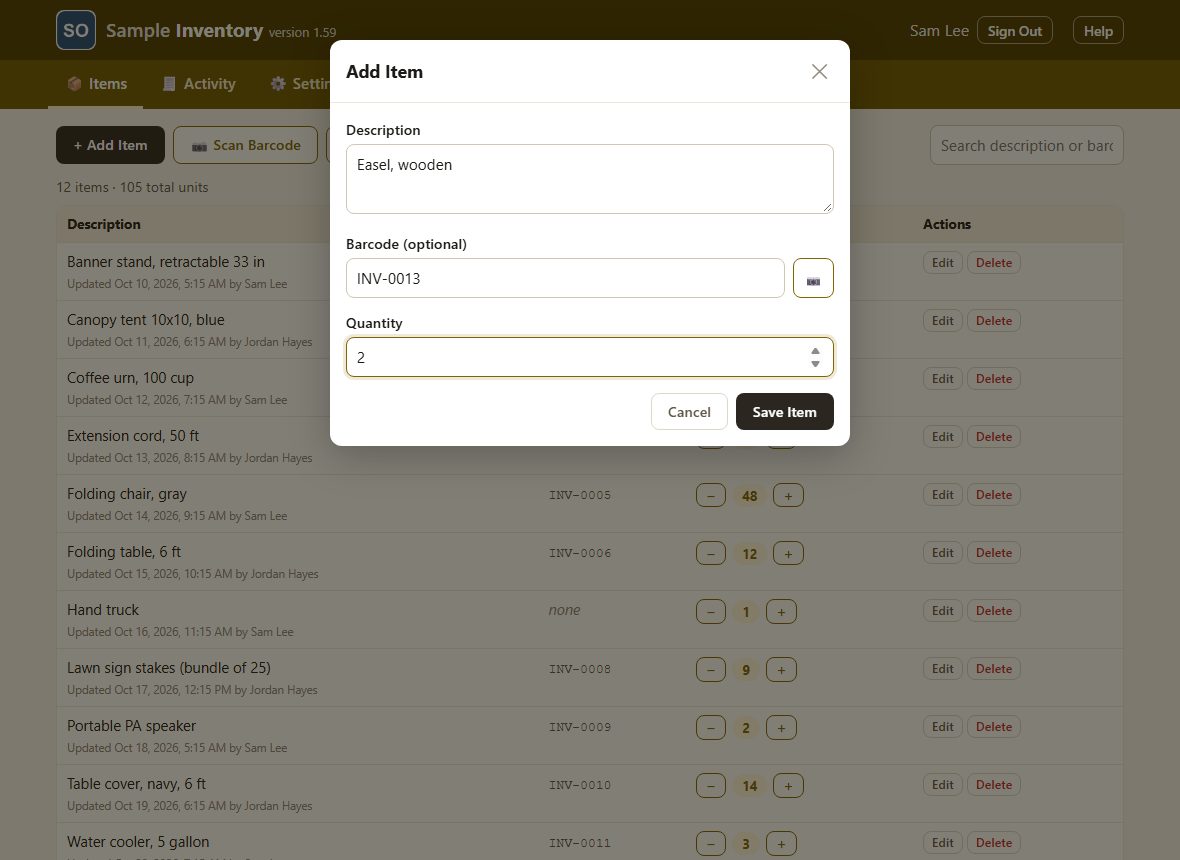
Tap + Add Item. Type a Description that tells one item from another, for example the size or color. The barcode is optional and the quantity starts at 1.
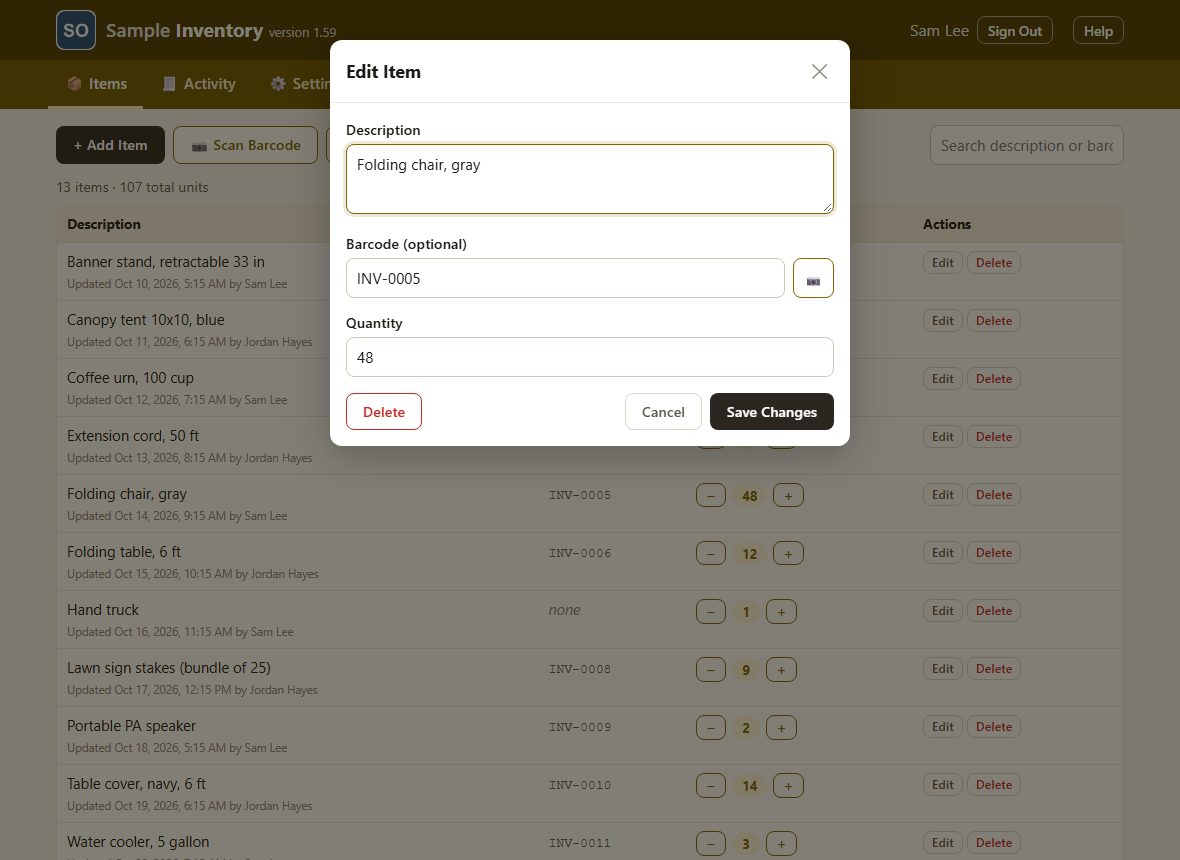
Type the barcode, or tap the camera button beside it to scan the label already on the item. Set the Quantity (a whole number, 0 or more), then tap Save Item. The description is the only required field.
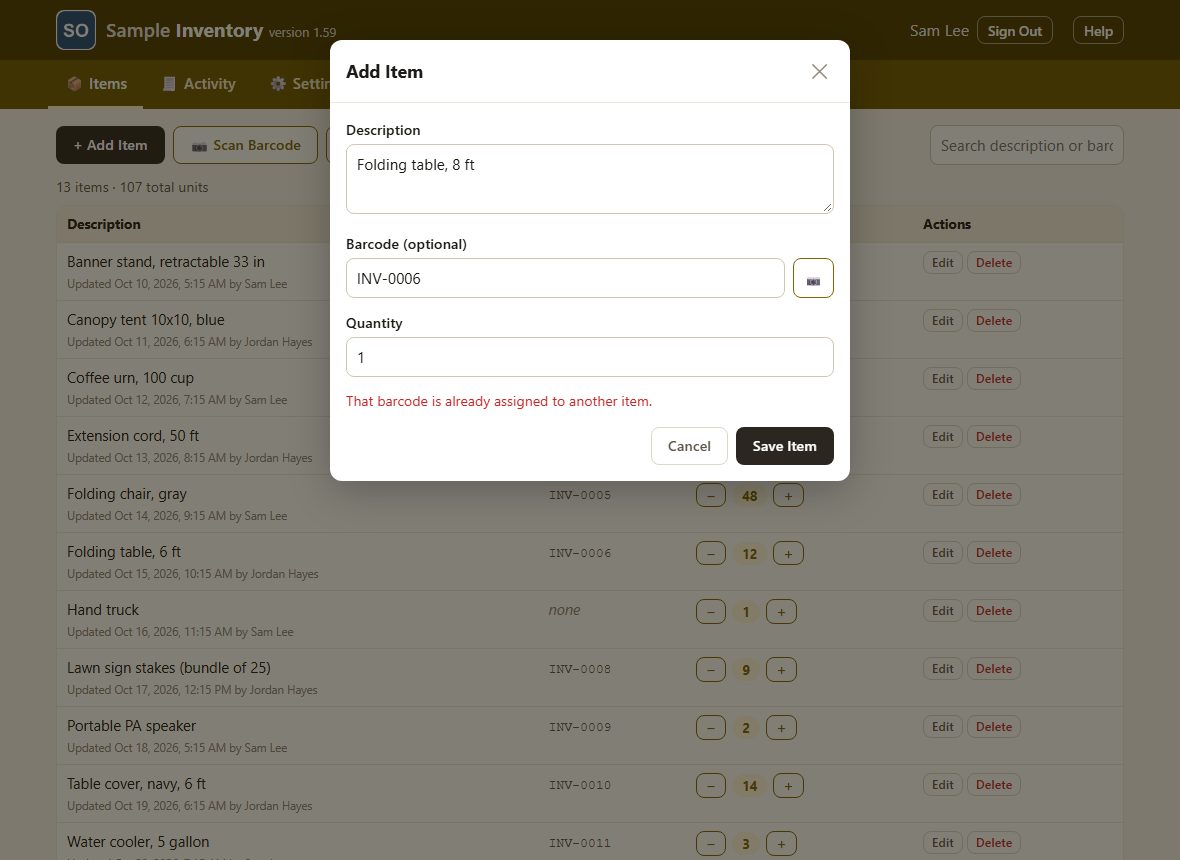
If the barcode is already on another item, the box says That barcode is already assigned to another item and nothing is saved. Check the label, or search for the code to find the other item (Searching the list).
Tap + or − beside an item to change its quantity by one. It saves at once, never goes below 0, and shows in The Activity tab. For a bigger change, use Editing an item.
Tap Edit to change the description, barcode or quantity, then tap Save Changes. Cancel closes the box without saving. The old and new values are recorded in The Activity tab.
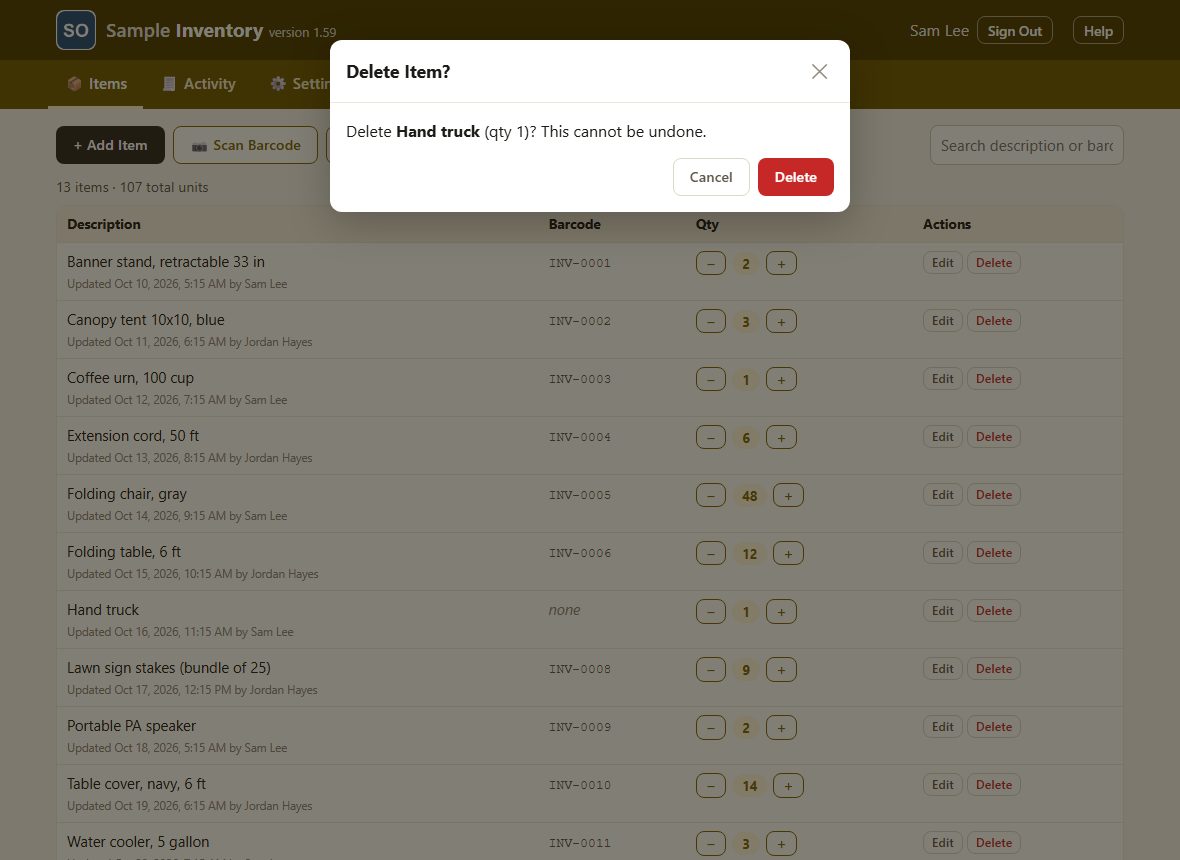
Tap Delete on the row (or inside the Edit box). A confirmation names the item and says This cannot be undone. Tap Delete again to remove it for good, or Cancel to keep it. The deletion is recorded in The Activity tab with the item's last description, quantity and barcode.
Scan Barcode works differently for editors. If the code belongs to an item, its Edit Item box opens straight away. If no item has that code, the Add Item box opens with the barcode already filled in, ready for you to describe the item. (Volunteers get the look-up box in The Item Found box.)
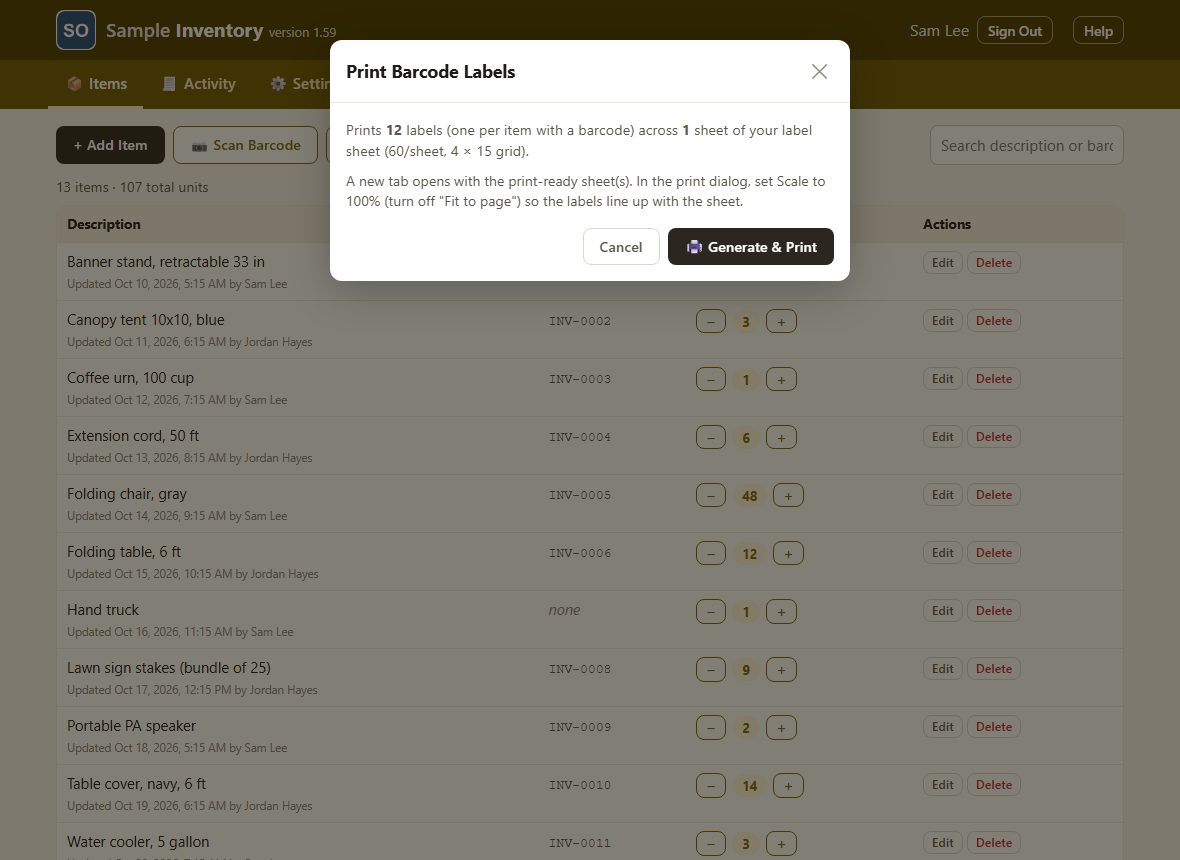
Tap Print Labels. The box says how many labels will print: one for every item that has a barcode, or only those matching your current search (Searching the list). Tap Generate & Print; a new tab opens with the sheet and the print box. Choose a printer, set Scale to 100% (turn off "Fit to page") so the labels line up, and print. If nothing opens, allow pop-ups for this site. A sheet holds 60 labels, 4 across and 15 down; more items print on extra pages.
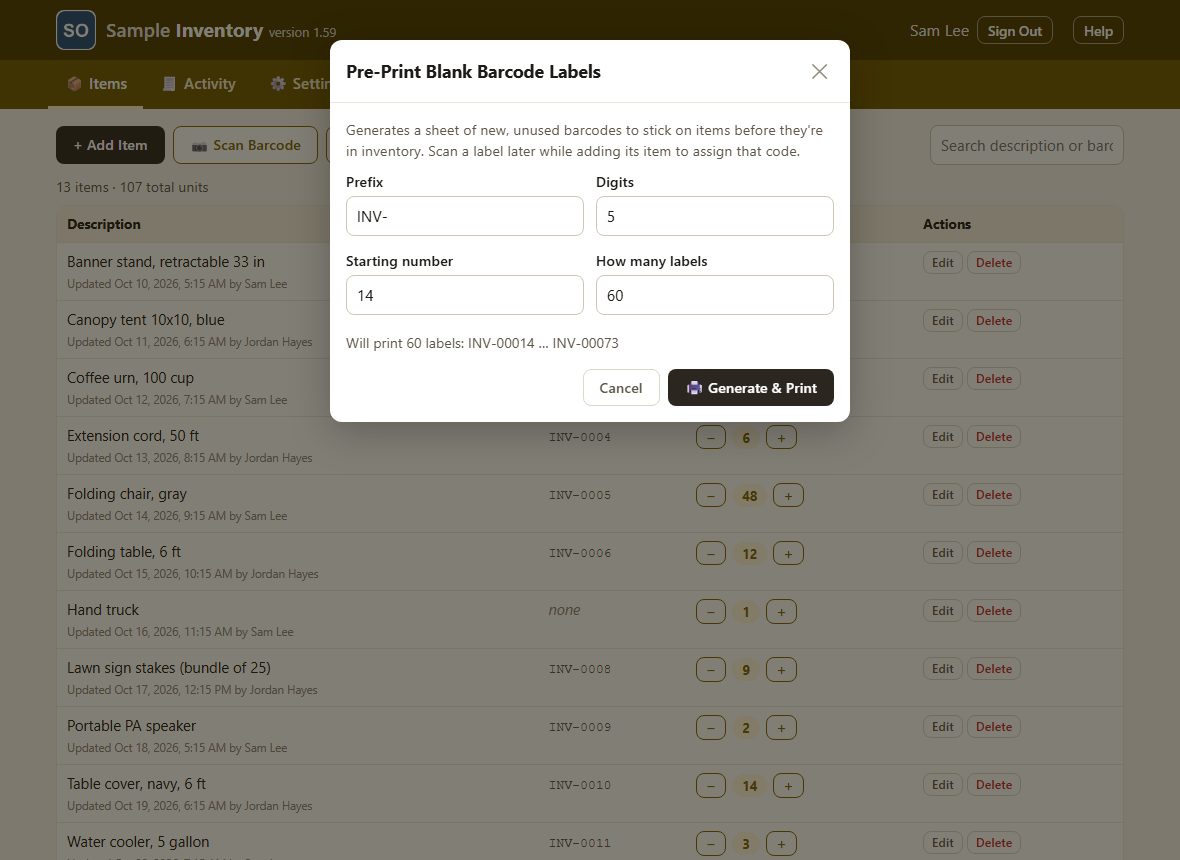
To label things before they are in the list, tap Print Blank Labels. Choose the Prefix, the number of Digits, the Starting number (it suggests the next unused one) and How many labels (up to 300). The line under the boxes previews the first and last code. Tap Generate & Print and print as in Printing labels for existing items. Stick a label on each item now; later, scan it while adding the item (Adding an item) and the code becomes that item's barcode. The app won't print codes that already belong to an item.
People and access. Admins decide who may use Inventory and at what level.
Using your admin access
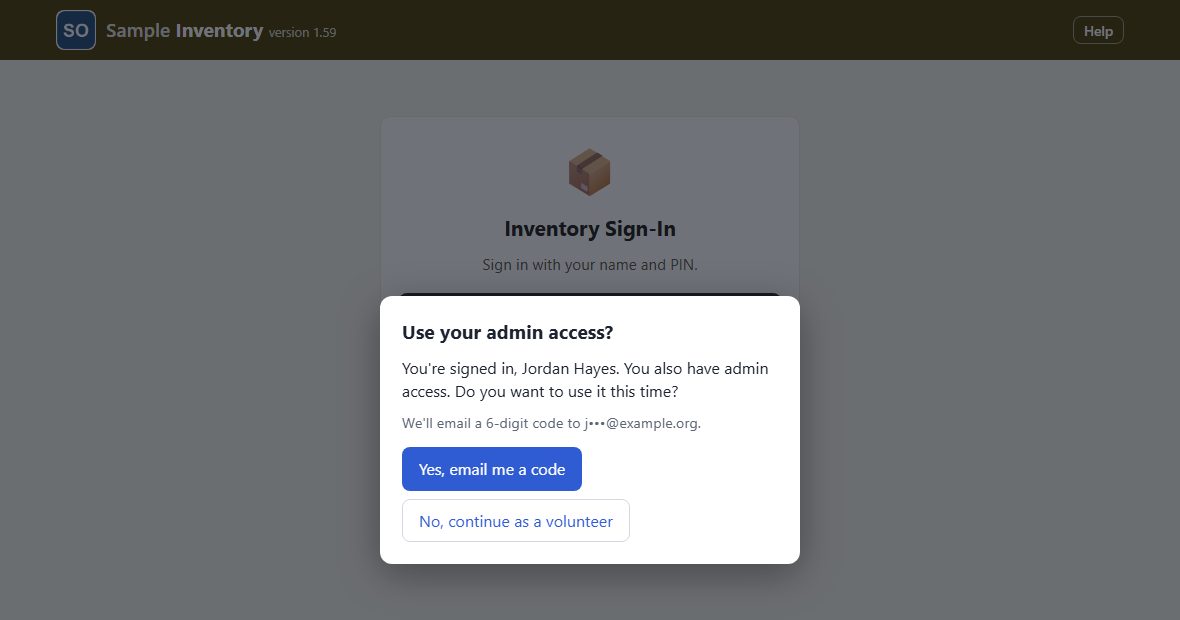
Everyone signs in at the volunteer level first (Opening Inventory and signing in). If you hold admin access, a box then asks Use your admin access?No, continue as a volunteer keeps you at the normal level; the Admin access button in the header lets you step up later. It only appears for people who hold admin access.
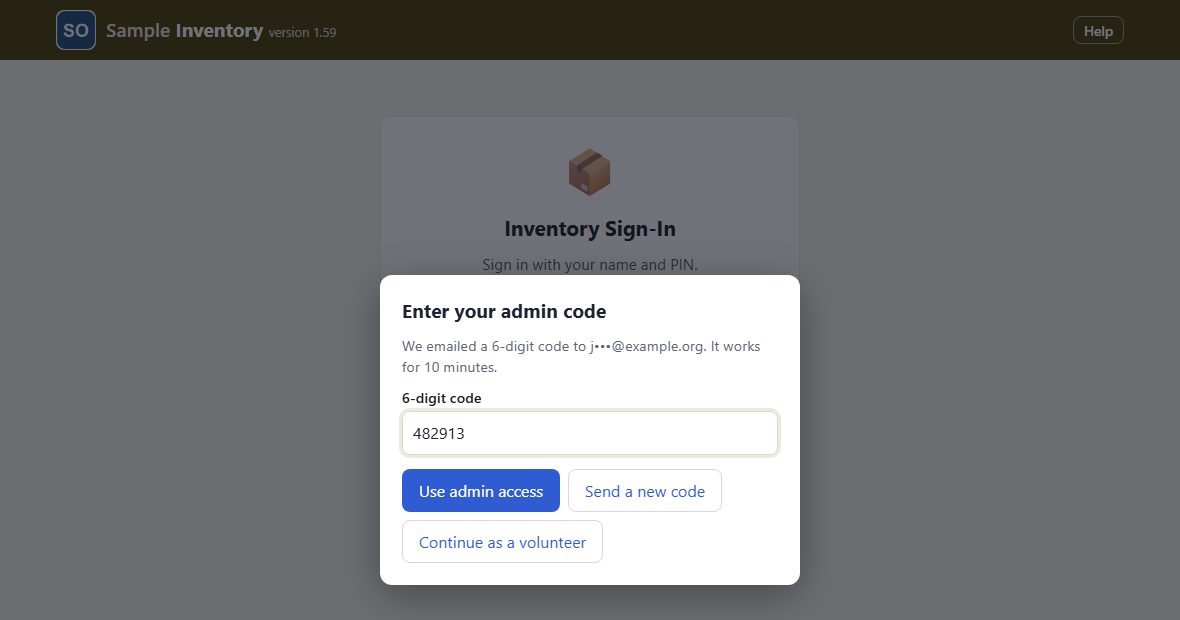
Tap Yes, email me a code, type the 6-digit code from your email and tap Use admin access. The code works once and expires in 10 minutes; Send a new code sends another. Anyone who is an admin needs an email address on file for this.
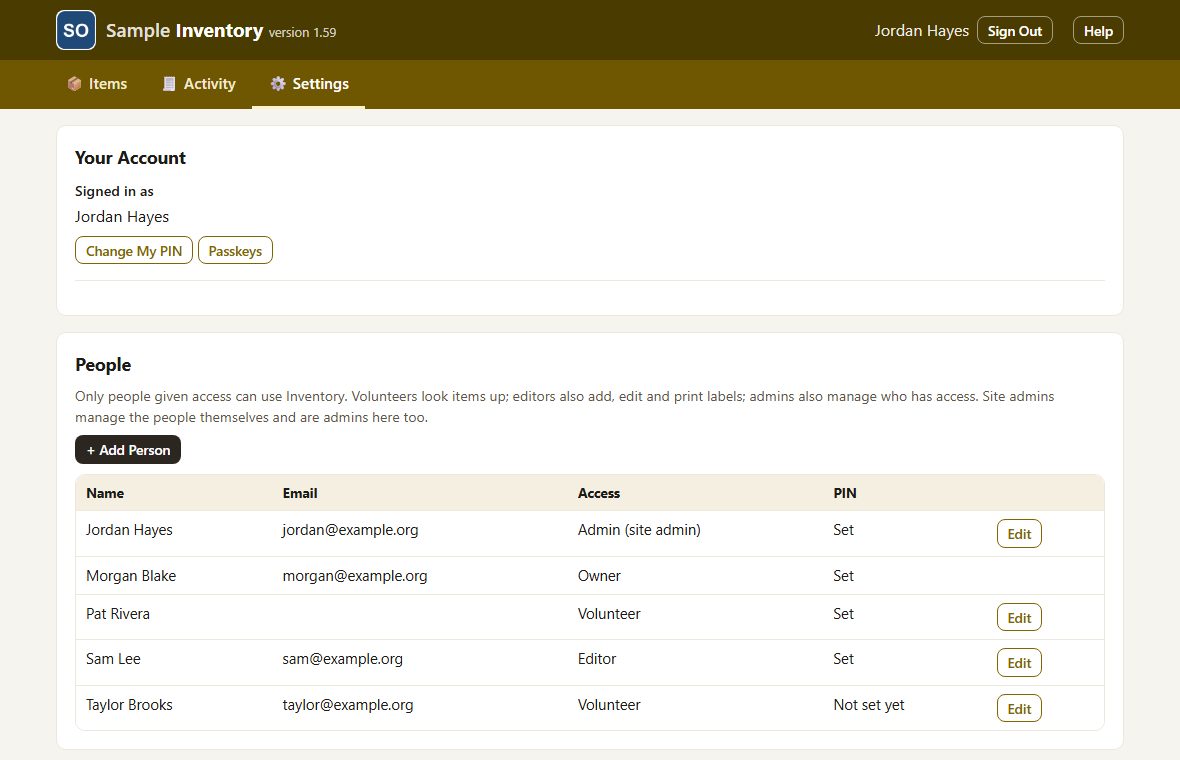
With admin access, Settings has a People section listing each person with their email, their Inventory access (Volunteer, Editor, Admin or No access; site admins and owners are marked) and whether their PIN is set. Inventory admins see the people of this app; site admins see everyone on the site.
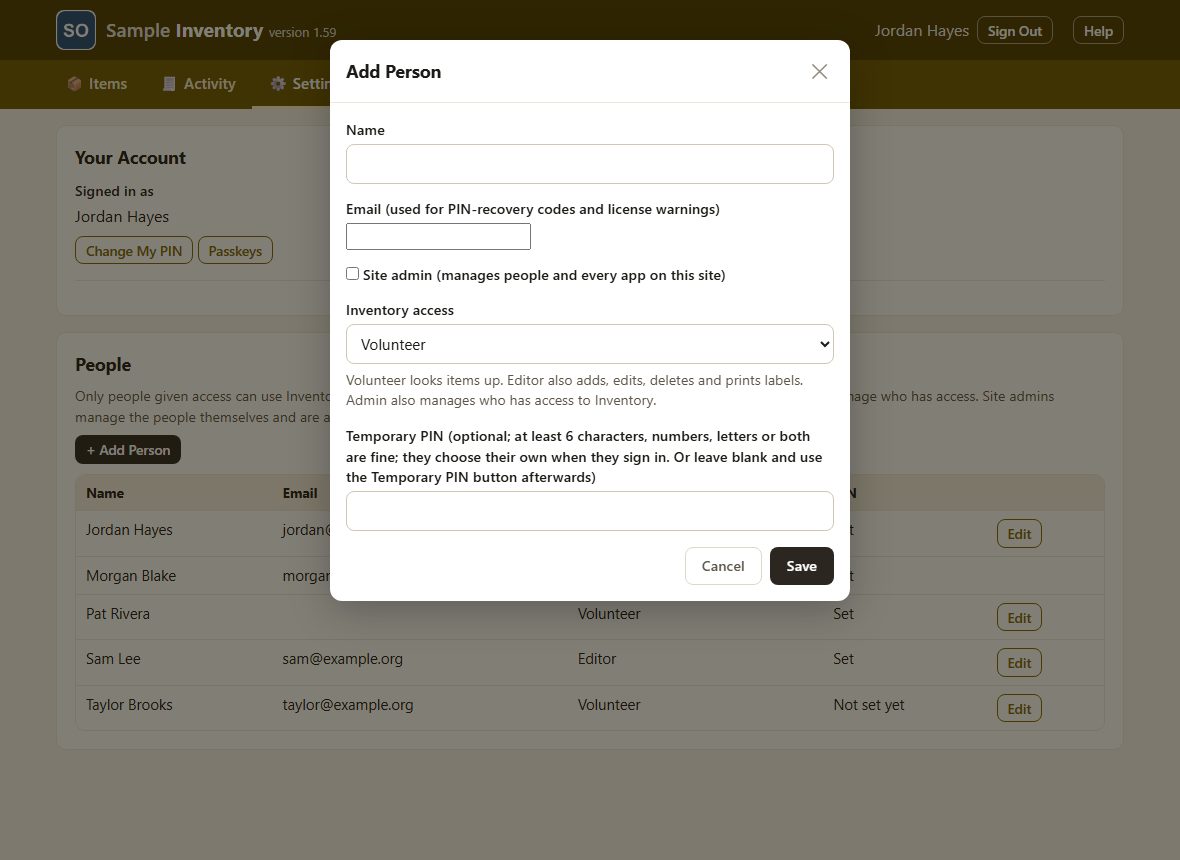
Tap + Add Person. Type the name exactly as the person will sign in with it and pick the Inventory access level. A site admin can also enter an email address, tick Site admin and set a temporary PIN here. Nobody can add themselves: people not on the list can only send the request in Not in the system yet?. Tap Save.
Changing access, temporary PINs and removing people
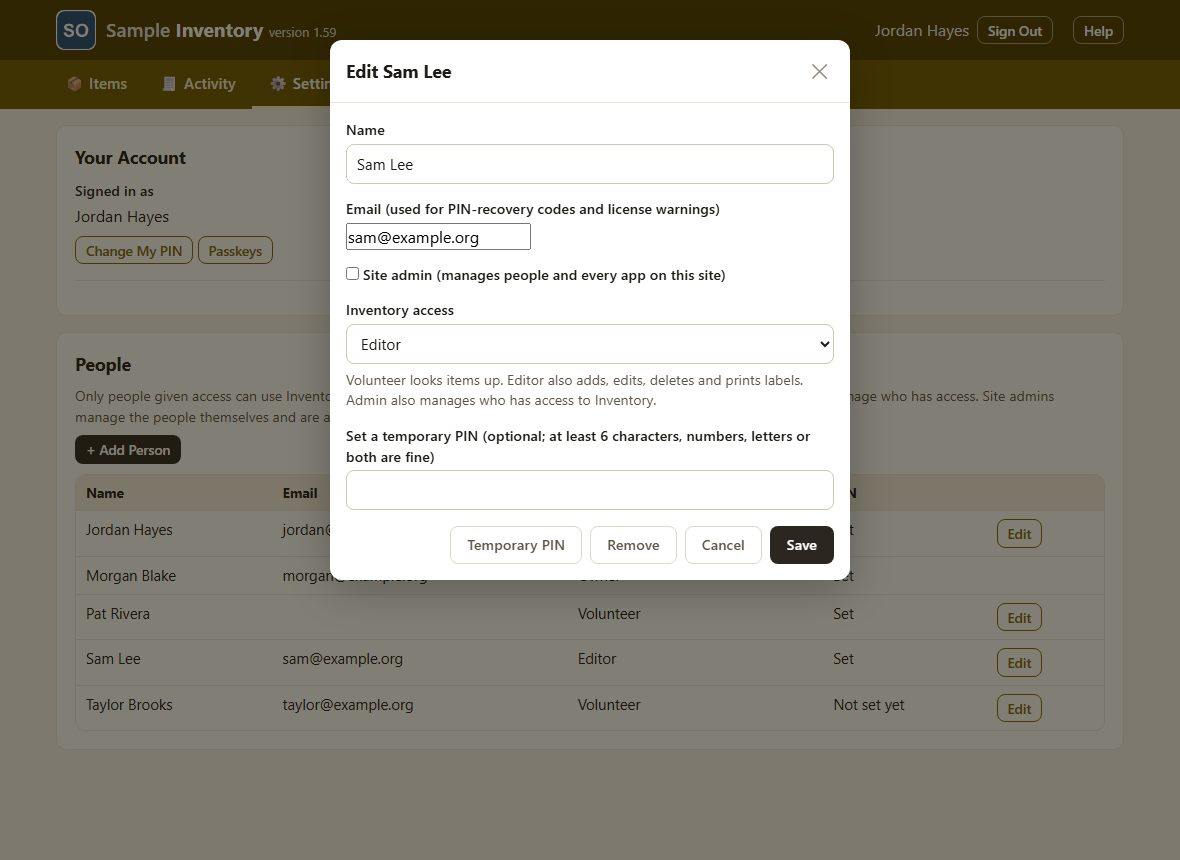
Tap Edit on a row to change someone's Inventory access. Temporary PIN replaces their PIN with a new one-time 6-digit PIN: it is emailed to them if an address is on file, otherwise shown once for you to pass on. It expires in 14 days, and they choose their own PIN when they sign in with it (Your name and PIN). Only a site admin can use Remove, which takes the person off every app on the site; an Inventory admin can only set their access to No access. An owner's account can only be changed by an owner.
For site admins, the header shows when your organization's license ends, after the version number. If the license stops being active, everyone sees the notice in When Inventory is paused; the license is renewed with the company that supplies the app. People and app access can also be managed on your site's permissions page (Site Auth).